Companies Home Search Profile

Photoshop One-on-One: Advanced

Focused View

Deke McClelland

13:04:10

0 View
  • [1] Welcome to Photoshop One-on-One.mp4
    01:45
  • [2] Previously on Photoshop One-on-One.mp4
    06:42
  • [1] Color Range, Focus Area, and more.mp4
    01:23
  • [2] Introducing the Color Range command.mp4
    06:00
  • [3] Customizing a Color Range selection.mp4
    04:38
  • [4] Localized Color Clusters and Detect Faces.mp4
    08:55
  • [5] Selecting a real-world photographic object.mp4
    05:28
  • [6] Cleaning up with the Wand and Brush tools.mp4
    09:51
  • [7] Refining your mask to absolute perfection.mp4
    12:49
  • [8] Shading the airplane to match the sky.mp4
    07:15
  • [9] Infusing the airplane with sky colors.mp4
    07:45
  • [10] Adding a custom Motion Blur effect.mp4
    04:27
  • [11] Adding a rocket plume.mp4
    04:33
  • [12] Introducing the Focus Area command.mp4
    04:26
  • [13] Using the Focus Area tool.mp4
    04:50
  • [14] Cleaning up a jagged Focus Area mask.mp4
    09:42
  • [15] Finessing hair and other details.mp4
    07:25
  • [16] Using the Select Subject command.mp4
    03:41
  • [17] Using the Select Sky command.mp4
    03:21
  • [18] The Sky Replacement command.mp4
    03:45
  • [19] Shift Edge and Fade Edge.mp4
    04:06
  • [1] Compositing like a pro.mp4
    02:02
  • [2] Static selection vs. dynamic layer mask.mp4
    07:09
  • [3] Perfecting mask edges with the Smudge tool.mp4
    04:46
  • [4] White reveals, black conceals.mp4
    06:43
  • [5] Real-world layer masking.mp4
    07:22
  • [6] Combining multiple passes of Color Range.mp4
    06:38
  • [7] Painting away gaps in a layer mask.mp4
    12:00
  • [8] Making your mask the best it can be.mp4
    11:32
  • [9] Feather and Density = even better hair.mp4
    08:12
  • [10] Introducing the Select and Mask command.mp4
    04:51
  • [11] Refine Hair and Object Aware.mp4
    03:31
  • [12] Edge Detection and Smart Radius.mp4
    03:38
  • [13] Remember Settings and Save Preset.mp4
    02:11
  • [14] Using the Refine Edge Brush.mp4
    04:07
  • [15] Enhancing the cloud man composition.mp4
    05:19
  • [16] Bringing back Refine Mask.mp4
    07:15
  • [1] Meet the transformations.mp4
    01:32
  • [2] Introducing the Free Transform command.mp4
    07:10
  • [3] Using the reference point.mp4
    04:20
  • [4] Skewing and distorting a layer.mp4
    06:57
  • [5] Bending warping a layer.mp4
    07:57
  • [6] Transform and duplicate in one operation.mp4
    04:13
  • [7] Transform and duplicate keyboard shortcuts.mp4
    05:29
  • [8] Setting the Free Transform frame color.mp4
    04:50
  • [9] Transforming a selection outline.mp4
    07:25
  • [10] Repeating one or more transformations.mp4
    07:08
  • [11] Customizing a repeated transformation.mp4
    03:26
  • [12] Transforming and warping text.mp4
    09:47
  • [13] Filling text with a warped gradient.mp4
    06:52
  • [1] Photoshops indestructible envelopes.mp4
    01:46
  • [2] Three ways to create a Smart Object.mp4
    05:36
  • [3] Applying nondestructive transformations.mp4
    06:55
  • [4] Applying nondestructive distortions.mp4
    06:21
  • [5] Masking Smart Objects.mp4
    08:53
  • [6] Editing the contents of a Smart Object.mp4
    10:04
  • [7] Applying editable smart adjustments.mp4
    04:35
  • [8] Applying and blending Smart Filters.mp4
    06:43
  • [9] Editing a filter mask.mp4
    06:53
  • [10] Applying Camera Raw as a Smart Filter.mp4
    06:20
  • [11] Opening a Camera Raw Smart Object.mp4
    04:25
  • [12] Two ways to duplicate a Smart Object.mp4
    06:03
  • [13] Protecting editable text.mp4
    05:08
  • [14] Using nested Smart Objects.mp4
    05:25
  • [15] Editing text inside a nested Smart Object.mp4
    03:12
  • [16] Pasting a Smart Object from Illustrator.mp4
    06:03
  • [17] Troubleshooting Illustrator Smart Objects.mp4
    04:58
  • [1] Restoring missing details.mp4
    00:45
  • [2] Uncropping a photo by expanding the canvas.mp4
    05:54
  • [3] The Content-Aware Scale command.mp4
    07:06
  • [4] The Content-Aware Fill taskspace.mp4
    07:22
  • [5] When to turn Color Adaptation down or off.mp4
    08:02
  • [6] Restoring a missing photographic element.mp4
    07:06
  • [7] Fitting a photo to a custom print size.mp4
    08:41
  • [8] Applying an image stack mode.mp4
    06:47
  • [9] Combining a stack mode with Spot Healing.mp4
    04:05
  • [10] Erasing people with the Median mode.mp4
    07:12
  • [11] Blurring away registration problems.mp4
    04:21
  • [12] Auto-blending multiple depths of field.mp4
    06:34
  • [13] Auto-blending with more flexibility.mp4
    05:35
  • [1] Perfecting the human form.mp4
    01:13
  • [2] Introducing the Liquify filter.mp4
    08:17
  • [3] Using the Pucker and Bloat tools.mp4
    09:29
  • [4] The Twirl, Push, and Smooth tools.mp4
    07:02
  • [5] Using Liquifys masking tools.mp4
    08:23
  • [6] Face-Aware Liquify.mp4
    05:28
  • [7] Special face-recognition scenarios.mp4
    05:17
  • [8] Making direct edits with the Face tool.mp4
    03:59
  • [9] Resetting any and all facial features.mp4
    03:55
  • [1] Photoshops alternative to pixels.mp4
    01:15
  • [2] How vector-based shape layers work.mp4
    06:46
  • [3] Introducing the Shape tools.mp4
    04:41
  • [4] Rounding the corners of a live rectangle.mp4
    03:41
  • [5] Controlling the visibility of a path outline.mp4
    03:24
  • [6] Creating a dashed or dotted border.mp4
    05:20
  • [7] Aligning and positioning a shape.mp4
    03:17
  • [8] Custom shapes and the Shapes panel.mp4
    05:33
  • [9] Duplicating and distributing shapes.mp4
    02:41
  • [10] Creating your own custom shape.mp4
    05:46
  • [11] Designing a custom shape in Illustrator.mp4
    07:22
  • [12] Selecting, modifying, and combining shapes.mp4
    07:33
  • [13] The wily ways of the Line tool.mp4
    04:55
  • [14] Drawing a line with an arrowhead.mp4
    04:47
  • [15] Curving a line with the Convert Point tool.mp4
    04:28
  • [16] Blending vectors with a pixel-based photograph.mp4
    06:49
  • [1] Blending layers.mp4
    01:25
  • [2] Normal and Dissolve.mp4
    05:27
  • [3] Using the Dissolve mode.mp4
    07:27
  • [4] Multiply and the other darken modes.mp4
    06:20
  • [5] Using the Multiply mode.mp4
    08:07
  • [6] Screen and the other lighten modes.mp4
    04:49
  • [7] Using the Screen mode.mp4
    09:26
  • [8] Using the Dodge and Burn modes.mp4
    05:44
  • [9] Overlay and the contrast modes.mp4
    07:17
  • [10] Using the Overlay and Soft Light modes.mp4
    06:36
  • [11] Difference, Exclusion, Subtract, and Divide.mp4
    06:15
  • [12] Capturing the differences between images.mp4
    05:02
  • [13] Hue, Saturation, Color, and Luminosity.mp4
    08:01
  • [14] Blend mode keyboard shortcuts.mp4
    05:48
  • [15] The Brush tool blend modes.mp4
    05:48
  • [16] The remarkable Fill Opacity Eight.mp4
    07:29
  • [17] Blend If This Layer and Underlying Layer.mp4
    04:50
  • [18] Using This Layer and Underlying Layer.mp4
    04:46
  • [1] Depth, contour, and texture.mp4
    01:32
  • [2] Applying a drop shadow.mp4
    06:23
  • [3] Working with Fill Opacity.mp4
    04:05
  • [4] Applying an inner shadow.mp4
    06:19
  • [5] Working with Global Light.mp4
    05:06
  • [6] Creating a blurry, spray paint-style type.mp4
    08:06
  • [7] Creating your own custom contour.mp4
    05:43
  • [8] Introducing Bevel and Emboss.mp4
    07:13
  • [9] Combining multiple layer effects.mp4
    04:18
  • [10] Copying effects between layers and groups.mp4
    05:02
  • [11] Assigning multiple strokes to a single layer.mp4
    06:48
  • [12] Combining multiple drop shadows.mp4
    05:38
  • Description


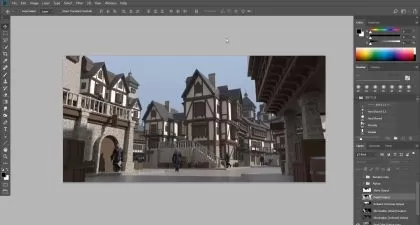
    Discover how to be the best Adobe Photoshop user you know. This comprehensive, project-based course is the second in a series of three courses by industry pro Deke McClelland. Deke doesn't just talk about the advanced features in Photoshop—he ties each concept to a clearly defined task, ensuring that you close out each chapter with a practical understanding of how things really work. Deke dives into the selection commands, including Color Range, Focus Area, Select > Subject, and Sky Replacement. He explains the best ways to refine your edges and layer masks. He covers such power features as transformations, smart objects, and image reconstruction. Plus, he delves into the intricacies of vector-based shapes, blend modes, layer effects, levels and curves, and so much more.

    More details


    User Reviews
    Rating
    0
    0
    0
    0
    0
    average 0
    Total votes0
    Focused display
    Category
    Deke McClelland
    Deke McClelland
    Instructor's Courses
    Self-appointed expert on all things graphics and imaging, here to answer your questions and serve your needs. Author of over 80 books and over 85 lynda.com courses on Photoshop, InDesign, Illustrator and other things computer graphical. Humble host of weekly series, Deke's Techniques at LinkedIn Learning. #Photoshop #AdobeIllustrator
    LinkedIn Learning is an American online learning provider. It provides video courses taught by industry experts in software, creative, and business skills. It is a subsidiary of LinkedIn. All the courses on LinkedIn fall into four categories: Business, Creative, Technology and Certifications. It was founded in 1995 by Lynda Weinman as Lynda.com before being acquired by LinkedIn in 2015. Microsoft acquired LinkedIn in December 2016.
    • language english
    • Training sessions 135
    • duration 13:04:10
    • English subtitles has
    • Release Date 2025/02/10

    Courses related to Photoshop