Companies Home Search Profile

Nagios | Ultimate IT monitoring guide with EyesOfNetwork

Focused View

Tech Academy

10:31:05

3 View
  • 1. Introduction to EyesOfNetwork.mp4
    04:55
  • 2. IT infrastructure to monitor.mp4
    02:14
  • 1.1 Links.txt
  • 1. Virtualbox download and installation.mp4
    02:12
  • 2.1 Links.txt
  • 2. EyesOfNetwork installation.mp4
    06:22
  • 3.1 Links.txt
  • 3. Mobaxterm installation.mp4
    01:44
  • 4.1 DHCP deactivation on CentOS.docx
  • 4. DHCP Deactivation.mp4
    06:11
  • 5. EONWeb Overview.mp4
    02:01
  • 6.1 Links.txt
  • 6. Themes Manager Installation.mp4
    06:16
  • 7.1 Links.txt
  • 7. Windows 10 download.mp4
    01:50
  • 8. Windows 10 installation and setup.mp4
    07:39
  • 1. Checks workflow in EyesOfNetwork.mp4
    01:34
  • 2.1 SNMP installation.txt
  • 2. Windows 10 host monitoring.mp4
    13:43
  • 3. What is NRPE .mp4
    04:35
  • 4.1 Update check nrpe.txt
  • 4. Update the check NRPE plugin.mp4
    06:39
  • 5.1 Links.txt
  • 5. NSClient++ & Notepad++ installation.mp4
    04:15
  • 6. How to setup NRPE.mp4
    05:40
  • 7.1 DH parameters.txt
  • 7. Setup NRPE with SSL.mp4
    04:45
  • 8.1 Client Authentication.txt
  • 8. Setup NRPE with Client Authentication (Part 12).mp4
    05:34
  • 9.1 Links.txt
  • 9. Setup NRPE with Client Authentication (Part 22).mp4
    06:41
  • 10.1 Links.txt
  • 10. Use external scripts in NSClient++.mp4
    04:05
  • 11.1 NSClient-Final-Conf-and-scripts.zip
  • 11. Use external scripts with arguments in NSClient++.mp4
    04:20
  • 12. Add the check ping service to EyesOfNetwork.mp4
    03:49
  • 13.1 Links.txt
  • 13. Nagios resources and macros list.mp4
    05:41
  • 14.1 Links.txt
  • 14. JNRPE Download.mp4
    01:51
  • 15. JNRPE Installation.mp4
    02:40
  • 16. Install JNRPE service using NSSM tool.mp4
    04:06
  • 17. How to setup JNRPE.mp4
    12:57
  • 18. Check users with JNRPE.mp4
    01:29
  • 19. Add JNRPE checks to EyesOfNetwork.mp4
    06:45
  • 1.1 Links.txt
  • 1. TOMCAT download and installation.mp4
    02:30
  • 2.1 Links.txt
  • 2. Check TOMCAT memory.mp4
    04:35
  • 3. Check TOMCAT threads.mp4
    02:45
  • 4. Add TOMCAT services to EyesOfNetwork.mp4
    03:38
  • 5.1 Links.txt
  • 5. Check JVM memory.mp4
    04:39
  • 6.1 final-jnrpe.zip
  • 6.2 Links.txt
  • 6. JVM Handle JMX Objects.mp4
    07:08
  • 7. Add JVM services to EyesOfNetwork.mp4
    03:50
  • 8. Monitor the JAVA process.mp4
    01:55
  • 9. Add the JAVA process check to EyesOfNetwork.mp4
    04:26
  • 10. Monitor the TOMCAT service.mp4
    01:53
  • 11. Add the TOMCAT service to EyesOfNetwork.mp4
    02:35
  • 12. Check the TOMCAT http homepage.mp4
    03:25
  • 13.1 Links.txt
  • 13. Generate TOMCAT keystore.mp4
    04:05
  • 14.1 Links.txt
  • 14. Download and install the Key Explorer tool and read the keystore.mp4
    01:37
  • 15.1 server.zip
  • 15. Configure and monitor TOMCAT https.mp4
    04:10
  • 16. Add the https check to EyesOfNetwork.mp4
    01:59
  • 17.1 Links.txt
  • 17. Check the certificates inside the keystore (Part 12).mp4
    09:39
  • 18. Check the certificates inside the keystore (Part 22).mp4
    03:05
  • 19. Add the certificates check to EyesOfNetwork.mp4
    05:56
  • 1.1 Links.txt
  • 1. Download Oracle and extend the Virtual Machine storage.mp4
    09:28
  • 2. Oracle XE Installation.mp4
    02:53
  • 3.1 Links.txt
  • 3. Download and install SQL Developer.mp4
    02:18
  • 4.1 Final db-sample-schemas-master.zip
  • 4.2 Links.txt
  • 4. Create a new schema in Oracle.mp4
    06:55
  • 5.1 Links.txt
  • 5. Install the Check Oracle health plugin.mp4
    05:03
  • 6.1 Links.txt
  • 6. Check Oracle Health DBD and OracleClient.mp4
    06:05
  • 7.1 Permanent Variable Export.txt
  • 7. Check Oracle Health Permanent variables export.mp4
    03:19
  • 8. Check Oracle Health Check modes.mp4
    06:44
  • 9.1 Links.txt
  • 9. Check Oracle Health Create nagios user.mp4
    07:29
  • 10. Create Oracle host and check oracle command (include troubleshooting).mp4
    10:02
  • 11. Oracle tnsping service.mp4
    06:20
  • 12. Oracle connection-time service.mp4
    02:46
  • 13. Oracle Create other services by duplication.mp4
    02:56
  • 14. Oracle Create password expiration service.mp4
    04:49
  • 1. NAS SNMP Configuration.mp4
    03:52
  • 2. NAS Check CPU service.mp4
    04:13
  • 3. NAS Create a shared folder on the NAS.mp4
    02:33
  • 4. NAS Check shared drive from command line.mp4
    03:10
  • 5. NAS Add the shared folder service to EyesOfNetwork.mp4
    03:26
  • 6. JOB Exporter incident (Troubleshooting).mp4
    04:57
  • 7. CentOS Extend HDD size from VirtualBox.mp4
    01:32
  • 8.1 Links.txt
  • 8. CentOS Extend filesystem size.mp4
    11:30
  • 9. NAS Checks overview.mp4
    01:00
  • 10. NAS Fix the Memory service (Troubleshooting).mp4
    05:10
  • 11. (Windows) Shared drive With native NSClient++ plugins.mp4
    07:26
  • 12. (Windows) Shared drive With native JNRPE plugins.mp4
    02:27
  • 13. (Windows) Shared drive Using a Powershell script.mp4
    03:45
  • 14. (Windows) Shared drive Map a network drive with Powershell script.mp4
    05:03
  • 15. (Windows) Shared drive Hide the password in Powershell script.mp4
    05:48
  • 16. (Windows) Shared drive Add the service to EyesOfNetwork.mp4
    01:23
  • 1.1 Links.txt
  • 1. UBUNTU Download.mp4
    00:53
  • 2. UBUNTU Installation and update.mp4
    05:11
  • 3.1 Links.txt
  • 3. UBUNTU Setup.mp4
    05:26
  • 4.1 UBUNTU --SNMP Configuration.txt
  • 4. UBUNTU Create the host on EyesOfNetwork.mp4
    05:29
  • 5. UBUNTU Fix the SNMP services.mp4
    03:28
  • 6.1 Docker Installation.txt
  • 6. DOCKER Installation.mp4
    02:01
  • 7.1 Links.txt
  • 7. NRPE agent Installation.mp4
    02:45
  • 8.1 Links.txt
  • 8. Install the Check docker plugin.mp4
    04:19
  • 9.1 Links.txt
  • 9. DOCKER Container monitoring.mp4
    04:03
  • 10.1 final-check docker.zip
  • 10. DOCKER Fix CPU service.mp4
    02:52
  • 11. UBUNTU Check nrpe plugin.mp4
    02:48
  • 12.1 final-common.zip
  • 12. DOCKER Check docker from Nagios.mp4
    07:03
  • 13. DOCKER Check docker from EyesOfNetwork.mp4
    02:19
  • 14. UBUNTU Check updates.mp4
    03:14
  • 15. UBUNTU Check users.mp4
    02:37
  • 16. UBUNTU Check CPU.mp4
    01:56
  • 17. UBUNTU Check memory.mp4
    02:40
  • 18. UBUNTU Check disk.mp4
    02:40
  • 1. (Visio) Dashboard Platform design strategy.mp4
    07:17
  • 2. (Visio) Dashboard Sketching the MAP.mp4
    06:06
  • 3. (Visio) Dashboard Gateways design.mp4
    13:35
  • 4. (Visio) Dashboard Sketch the webservers.mp4
    02:41
  • 5. (Visio) Dashboard Creating the form for hosts.mp4
    03:44
  • 6. (Visio) Dashboard Add the hosts to the MAP.mp4
    06:06
  • 7. (Visio) Dashboard Add the software components to the MAP.mp4
    09:23
  • 8. (Visio) Dashboard Dashboard customization.mp4
    07:33
  • 9. (Visio) Dashboard Global indicators.mp4
    15:24
  • 10. (Visio) Dashboard More adjustments.mp4
    02:23
  • 11. (Visio) Dashboard Adding the icons.mp4
    05:44
  • 12.1 Final dashboard files.zip
  • 12. (Visio) Dashboard Finalization.mp4
    04:59
  • 1. (Nagvis) Dashboard Map creation.mp4
    02:33
  • 2. (Nagvis) Dashboard Show the map configuration files.mp4
    01:58
  • 3. (Nagvis) Dashboard Full screen map.mp4
    04:15
  • 4. (Nagvis) Dashboard Add a static clock.mp4
    03:45
  • 5. (Nagvis) Dashboard Make the clock dynamic.mp4
    02:08
  • 6. (Nagvis) Dashboard Add style to the dynamic clock.mp4
    02:06
  • 7.1 Clock files.zip
  • 7. (Nagvis) Dashboard Add the date to the clock.mp4
    02:27
  • 1. (Nagvis) Dashboard Add the windows checks.mp4
    05:10
  • 2. What is NagiosBP .mp4
    01:41
  • 3. NagiosBP Create the first business process.mp4
    04:36
  • 4. NagiosBP Finalize the business process creation.mp4
    06:30
  • 5. NAGVIS Finalize the windows host checks.mp4
    02:19
  • 6. NAGVIS Configure the NAS host.mp4
    03:28
  • 7. NAGVIS Configure the UBUNTU host.mp4
    04:45
  • 8. UBUNTU Internet access.mp4
    05:16
  • 9. UBUNTU Ping the NAS.mp4
    01:15
  • 10. UBUNTU Finalize the host on Nagvis.mp4
    04:41
  • 11. WINDOWS Ping the NAS.mp4
    02:40
  • 12. NAGVIS. Components checks.mp4
    06:35
  • 13. NAGVIS Finalize the components checks (Oracle).mp4
    06:42
  • 14. (NAGVIS) Global checks Internet access.mp4
    03:05
  • 15. NAGVIS Fix the map errors.mp4
    02:21
  • 16. (NAGVIS) Global checks Router.mp4
    05:48
  • 17. (NAGVIS) Global checks Access point.mp4
    02:55
  • 18. (NAGVIS) Global checks Web servers.mp4
    03:26
  • 19.1 Final configuration files for MAP and hosts.zip
  • 19. (NAGVIS) Global checks Traffic light indicators.mp4
    09:50
  • 1. Full screen zoombar removal.mp4
    00:53
  • 2. Update the checks interval time.mp4
    01:21
  • 3. Simulate alerts on the map.mp4
    01:24
  • 1.1 Links.txt
  • 1. Postfix configuration with Gmail.mp4
    10:38
  • 2. Mail notification from a host.mp4
    02:29
  • 3. Mail notification from templates.mp4
    01:30
  • 1. UsersRoles management in EyesOfNetwork.mp4
    03:11
  • Description


    The complete guide for IT supervision with EyesOfNetwork bundle (Nagios/Nagvis/Nagiosbp/...)

    What You'll Learn?


    • Install the EyesOfNetwork solution with centOS operating system
    • Master the best monitoring software in the market (Nagios, Nagvis, NagiosBP, NSClient++,...etc)
    • Build virtually the IT infrastructure to monitor
    • Model any IT infrastructure as a MAP
    • Dashboard customization
    • Be able to monitor any IT object (OS/Database/Router/Application servers,...etc)
    • Monitor operating systems (Windows/Ubuntu: CPU, Disks, Memory, Network, users,... etc)
    • Monitor Oracle database objects (connection time, tablespaces, passwords expiration,... etc)
    • Issues troubleshooting
    • Monitor application servers (Tomcat: Memory, threads, service, homepage,..etc)
    • Nagios resources and Macros list
    • Understand and use Nagios business processes
    • Adapt and fix monitoring plugins
    • Create your own monitoring scripts
    • SNMP checks
    • Understand and use NRPE
    • Establish secured NRPE (with TLS, with client authentication)
    • Handle NRPE clients (NSClient++, JNRPE, Nagios agent)
    • Master the Nagvis module
    • Setup the mail notification
    • Users/Roles management in EyesOfNetwork
    • Get by the end a complete autonomous and reusable monitoring solution

    Who is this for?


  • People who want to learn how to monitor an IT infrastructure
  • IT engineers and integrators who are motivated to boost their career
  • Business owners who need to get a ready to use monitoring solution to keep an eye on their information system
  • What You Need to Know?


  • Basic IT knowledge
  • A computer
  • Internet connnection
  • No prior knowledge about monitoring is necessary
  • More details


    Description

    Welcome to my course on EyesOfNetwork.

    EyesOfNetwork is Nagios based solution made up of a set of Open Source software that meet the needs of the big crescents for the supervision of Business Information Systems.

    This course will teach you, step by step, how to install and setup the EyesOfNetwork solution then how to use its main modules.

    We will build virtually our proper IT infrastructure to monitor in this course so we can cover the monitoring of all IT objects widely used in real life information systems.

    This is a Learn by example course, by following its lectures you will build a complete autonomous supervision system including a dashboard from which you can keep an eyes on all your IT platform from a single place.

    The troubleshooting lectures are bringing the fix for the most common issues that you can face when putting such solution in place.

    In this course, you will:

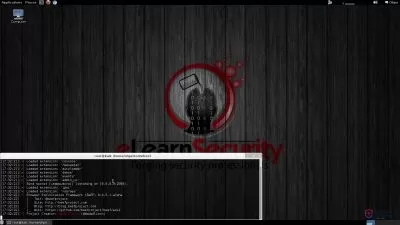
    • Install EyesOfNetwork with CentOS from ISO.

    • EyesOfNetwork solution setup and overview.

    • Build the IT infra to monitor: Windows 10 host, Ubuntu host, Oracle database, Tomcat server, Java Virtual Machine, Docker,.. etc

    • How to use NRPE

    • Install and configure NRPE clients: NSClient++, JNRPE, Nagios agent

    • Windows related objects monitoring

    • Tomcat related objects monitoring

    • JVM related objects monitoring

    • TLS certificates monitoring

    • Oracle database related objects monitoring

    • Remote shared drive monitoring

    • Ubuntu related objects monitoring

    • Docker containers monitoring

    • Design a map with Microsoft Visio

    • Create and setup maps on Nagvis

    • Configure mail notification on EyesOfNetwork

    • Users/Roles management

    • And much more

    Enroll in this course now and become a monitoring pro.

    Who this course is for:

    • People who want to learn how to monitor an IT infrastructure
    • IT engineers and integrators who are motivated to boost their career
    • Business owners who need to get a ready to use monitoring solution to keep an eye on their information system

    User Reviews
    Rating
    0
    0
    0
    0
    0
    average 0
    Total votes0
    Focused display
    Tech Academy
    Tech Academy
    Instructor's Courses
    I'm an IT expert with more than 17 years of experience in IT and telecommunications fields.Solicited in large-scale projects internationally with multi-national companies on behalf overseas customers and governments.Our goal in the Tech Academy, is to share with you the skills learned over the years to help you on developing a very successful career.
    Students take courses primarily to improve job-related skills.Some courses generate credit toward technical certification. Udemy has made a special effort to attract corporate trainers seeking to create coursework for employees of their company.
    • language english
    • Training sessions 141
    • duration 10:31:05
    • English subtitles has
    • Release Date 2024/02/14

    Courses related to Ethical Hacking

    Courses related to Penetration Testing