Companies Home Search Profile

Maya 3D Masterclass - Modeling a 3D Sci-Fi Vehicle in Maya

Focused View

Digital Saucer Studios

23:13:57

10 View
  • 01. Promo.mp4
    03:21
  • 02. Introduction.mp4
    08:15
  • 03. Quick Introduction to Modeling Set-up.mp4
    18:22
  • 04. Bevel Too.mp4
    10:38
  • 05. Multi-Cut Tool.mp4
    14:40
  • 06. Extrude Tool.mp4
    06:18
  • 07. Setting Up the Image Planes.mp4
    12:08
  • 08. Blocking Out the Chassis.mp4
    04:10
  • 09. Creating the Front Bevel.mp4
    07:41
  • 10. Extruding the Wing.mp4
    03:01
  • 11. Modeling the Wing Part 1.mp4
    04:01
  • 12. Modeling the Wing Part 2.mp4
    07:01
  • 13. Modeling the Wing Part 3.mp4
    21:16
  • 14. Creating the Bottom Bevel.mp4
    07:20
  • 15. Creating Bevels for the Wing.mp4
    19:56
  • 16. Adding More Resolution to the Model.mp4
    22:22
  • 17. Creating the Cockpit with Boolean.mp4
    08:37
  • 18. Cleaning Up Front Cockpit Geometry.mp4
    17:19
  • 19. Cleaning Up Back Cockpit Geometry.mp4
    28:02
  • 20. Creating the Top Curved Bevel.mp4
    34:04
  • 21. Creating the Bottom Curved Bevel.mp4
    13:07
  • 22. Creating the Tail Fin Part 1.mp4
    16:36
  • 23. Creating the Tail Fin Part 2.mp4
    13:12
  • 24. Creating the Tail Fin Part 3.mp4
    16:40
  • 25. Creating the Turbine Engine Part 1.mp4
    05:34
  • 26. Creating the Turbine Engine Part 2.mp4
    05:15
  • 27. Creating the Turbine Engine Part 3.mp4
    06:27
  • 28. Creating the Turbine Engine Part 4.mp4
    03:27
  • 29. Creating the Turbine Engine Part 5.mp4
    19:30
  • 30. Creating the Turbine Engine Part 6.mp4
    05:04
  • 31. Creating the Turbine Engine Part 7.mp4
    09:28
  • 32. Creating the Turbine Engine Part 8.mp4
    09:10
  • 33. Creating the Turbine Engine Part 9.mp4
    09:35
  • 34. Creating the Turbine Engine Part 10.mp4
    17:45
  • 35. Creating the Turbine Engine Part 11.mp4
    14:04
  • 36. Creating the Turbine Engine Part 12.mp4
    24:12
  • 37. Creating the Turbine Engine Part 13.mp4
    17:56
  • 38. Creating the Damaged Engine Part 1.mp4
    02:37
  • 39. Creating the Damaged Engine Part 2.mp4
    17:59
  • 40. Creating the Damaged Engine Part 3.mp4
    07:24
  • 41. Creating the Damaged Engine Part 4.mp4
    03:39
  • 42. Creating the Damaged Engine Part 5.mp4
    04:38
  • 43. Creating the Damaged Engine Part 6.mp4
    28:21
  • 44. Creating the Damaged Engine Part 7.mp4
    17:20
  • 45. Creating the Damaged Engine Part 8.mp4
    19:09
  • 46. Creating the Damaged Engine Part 9.mp4
    09:12
  • 47. Creating the Damaged Engine Part 10.mp4
    21:24
  • 48. Creating the Front Panel Part 1.mp4
    16:50
  • 49. Creating the Front Panel Part 2.mp4
    27:02
  • 50. Creating the Front Panel Part 3.mp4
    06:24
  • 51. Creating the Front Panel Part 4.mp4
    06:53
  • 52. Creating the Repulsor Vents Part 1.mp4
    13:44
  • 53. Creating the Repulsor Vents Part 2.mp4
    10:49
  • 54. Creating the Repulsor Vents Part 3.mp4
    14:10
  • 55. Creating the Back Vent Part 1.mp4
    15:00
  • 56. Creating the Back Vent Part 2.mp4
    10:15
  • 57. Creating the Bevels for the Vents.mp4
    13:30
  • 58. Creating the Cockpit Part 1.mp4
    09:00
  • 59. Creating the Cockpit Part 2.mp4
    06:11
  • 60. Creating the Cockpit Part 3.mp4
    04:09
  • 61. Creating the Cockpit Part 4.mp4
    06:39
  • 62. Creating the Cockpit Part 5.mp4
    05:41
  • 63. Creating the Cockpit Part 6.mp4
    03:38
  • 64. Creating the Cockpit Part 7.mp4
    04:22
  • 65. Creating the Seats Part 1.mp4
    11:36
  • 66. Creating the Seats Part 2.mp4
    14:49
  • 67. Creating the Center Channel.mp4
    16:35
  • 68. Creating the Monitors.mp4
    08:08
  • 69. Creating the Steering Wheel.mp4
    18:43
  • 70. Creating the Head Rest.mp4
    13:33
  • 71. Creating the Gear Box.mp4
    15:55
  • 72. Creating the Gear Stick Part 1.mp4
    27:06
  • 73. Creating the Gear Stick Part 2.mp4
    20:25
  • 74. Creating the Cockpit Floor Part 1.mp4
    14:51
  • 75. Creating the Cockpit Floor Part 2.mp4
    17:52
  • 76. Creating the Cockpit Floor Part 3.mp4
    17:33
  • 77. Creating the Control Panel Part 1.mp4
    04:40
  • 78. Creating the Control Panel Part 2.mp4
    21:25
  • 79. Creating the Control Panel Part 3.mp4
    09:55
  • 80. Creating the Control Panel Part 4.mp4
    18:00
  • 81. Creating the Central Channel Controls.mp4
    19:23
  • 82. Creating the Windshield.mp4
    26:02
  • 83. Bevelling, Fixing and Mirroring.mp4
    14:31
  • 84. Creating the Front Engine Part 1.mp4
    18:33
  • 85. Creating the Front Engine Part 2.mp4
    10:23
  • 86. Creating the Front Engine Part 3.mp4
    24:15
  • 87. Creating the Front Engine Part 4.mp4
    13:18
  • 88. Creating the Front Engine Part 5.mp4
    09:48
  • 89. Creating the Rear Repulsor Part 1.mp4
    10:25
  • 90. Creating the Rear Repulsor Part 2.mp4
    09:26
  • 91. Creating the Rear Repulsor Part 3.mp4
    03:08
  • 92. Creating the Rear Repulsor Part 4.mp4
    11:21
  • 93. Creating the Rear Repulsors Part 5.mp4
    04:46
  • 94. Creating the Rear Repulsors Part 6.mp4
    08:43
  • 95. Cleaning Up the Scene.mp4
    19:21
  • 96. Making the Landspeeder Real World Size.mp4
    04:47
  • 97. Creating Displacement Maps Part 1.mp4
    19:14
  • 98. Creating Displacement Maps Part 2.mp4
    22:26
  • 99. Making Final Adjustments to the Model Before Rendering.mp4
    21:47
  • 100. Setting Up the Camera.mp4
    04:35
  • 101. Creating the Background.mp4
    05:09
  • 102. Creating the Background Texture.mp4
    04:27
  • 103. Texturing the Background.mp4
    08:24
  • 104. Creating a Second Background Texture.mp4
    07:30
  • 105. Creating Shaders for the Landspeeder.mp4
    13:32
  • 106. Creating the Glass and Reflective Lighting.mp4
    31:53
  • 107. Creating a Side Light.mp4
    04:18
  • 108. Setting Up the Final Render.mp4
    14:21
  • 109. Finishing Up in Photoshop.mp4
    05:31
  • Description


    Learn powerful modeling and rendering tools in Maya to create a 3D sci-fi vehicle from scratch.

    What You'll Learn?


    • You will learn 3D modeling tools and how to become a professional modeler in Maya
    • You will also learn how to set up the Maya camera
    • You will learn how to set up the lighting and how to create a professional looking render of your model

    Who is this for?


  • Anyone who is serious about learning 3D modeling in Maya
  • What You Need to Know?


  • You will need Maya
  • You will need the passion and enthusiasm to become a 3D modeler
  • More details


    Description

    Maya 3D Masterclass - Modeling a 3D Sci-Fi Vehicle in Maya

    This comprehensive course is over 23 hours long and dives deep into the modeling tools in Maya.

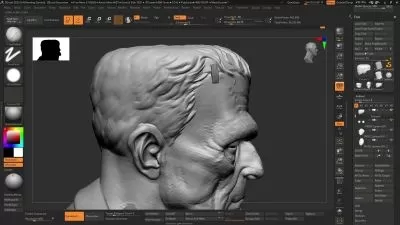
    I begin with showing you the three most common modeling tools in Maya:

    • Bevel Tool

    • Multi-Cut Tool

    • Extrude Tool

    And from that point on we dive deep into modeling the famous Landspeeder from Star Wars.

    We begin by blocking out the basic shape of the Landspeeder. We will block out the main body, or the chassis as it's usually called, followed by the wings, the cockpit area and the wings.

    Then we will move on to the next step and add details to all of the Landspeeder parts  - the turbine engines, the cockpit, the repulsor vents, every inch of the model.

    Along the way I will show you my modeling techniques. The instructions are clear and precise, and easy to follow along. I will explain my techniques and why I use them.

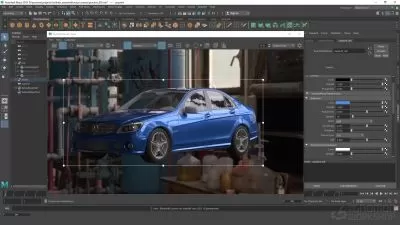
    Then we will dive into how to set up the camera, how to set up the lighting and finally, we will be rendering the Landspeeder so you will end up with a professional looking model you can add to your showreel.

    So let's dive into this course and become a master at 3D modeling in Maya.


    Who this course is for:

    • Anyone who is serious about learning 3D modeling in Maya

    User Reviews
    Rating
    0
    0
    0
    0
    0
    average 0
    Total votes0
    Focused display
    Category
    Digital Saucer Studios
    Digital Saucer Studios
    Instructor's Courses
    I am a digital artist with over ten years of experience. I've worked in film, TV and games.Now I create video tutorials to show you how to become a professional digital artist from scratch.My tutorials will take you through the whole process, including modeling, UV mapping, texturing, lighting and rendering.I will show you how to use software, such as Maya, Photoshop, ZBrush, Substance and many other applications.
    Students take courses primarily to improve job-related skills.Some courses generate credit toward technical certification. Udemy has made a special effort to attract corporate trainers seeking to create coursework for employees of their company.
    • language english
    • Training sessions 109
    • duration 23:13:57
    • Release Date 2024/04/23