Keyframe animation with Python & Blender
Oscar Villarreal
2:23:24
Description
Automating Pose-to-pose animation in Blender with the use of Python scripts
What You'll Learn?
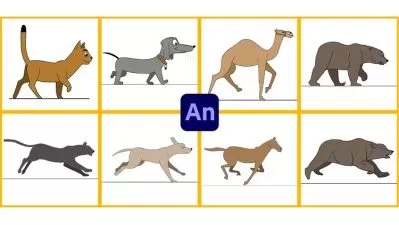
- Basic concepts about keyframe animations like keyframes and interpolation
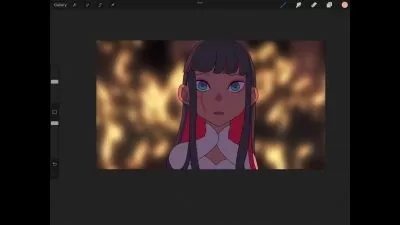
- Create a basic animation in Krita to then export the animation data to a json file
- Use Tensorflow JS with PoseNet to read the poses of a human body from a multimedia file
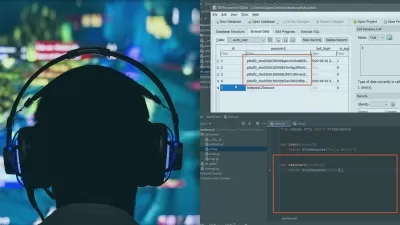
- Create a Python script that reads the pose data to create animated armature to recreate the source material.
- Execute the script in the scripting section provided by Blender
Who is this for?
What You Need to Know?
More details
DescriptionHello and welcome.
If you are a designer or developer who is interested in create pose-to-pose animations in a 3D environment with the possibilities to automate the process, this course is for you.
This course focuses on creating multiple Python scripts that will help us to read pose information from external sources like pictures and video and use it to create an animated armature.
For this, we will mainly use Blender as the 3D Editor and Python to create the scripts.
With Python, we will read JSON files that contains information about the positions of the limbs and time marks that can help us to identify keyframes.
With Blender, we will run the script to create an armature with an animation that recreate the poses from the original source.
We will also use Krita and Tensorflow to get the pose information that we will be using through the course.
You may like this course because it can help you save time when you want to create 3D animations.
In addition, you will have access to the content created during the course.
I hope you find the content useful and that you can apply it to your personal projects.
Have fun and happy learning.
In this course you will learn:
Basic concepts about keyframe animations like keyframes and interpolation
Create a basic animation in Krita to then export the animation data to a json file
Use Tensorflow JS with PoseNet to read the poses of a human body from a multimedia file
Create a Python script that reads the pose data to create animated armature to recreate the source material.
Execute the script in the scripting section provided by Blender
You will require:
You must be familiar with scripting; however, anyone can follow it as each step is explained.
Blender v 3 and above
Visual Studio Code. This is optional since Blender provide his own editor
Krita 5
Pre-trained TensorFlow JS models
Who this course is for:
- 3D designers or programmers who want to automate tasks to create complex 3D animations.
Hello and welcome.
If you are a designer or developer who is interested in create pose-to-pose animations in a 3D environment with the possibilities to automate the process, this course is for you.
This course focuses on creating multiple Python scripts that will help us to read pose information from external sources like pictures and video and use it to create an animated armature.
For this, we will mainly use Blender as the 3D Editor and Python to create the scripts.
With Python, we will read JSON files that contains information about the positions of the limbs and time marks that can help us to identify keyframes.
With Blender, we will run the script to create an armature with an animation that recreate the poses from the original source.
We will also use Krita and Tensorflow to get the pose information that we will be using through the course.
You may like this course because it can help you save time when you want to create 3D animations.
In addition, you will have access to the content created during the course.
I hope you find the content useful and that you can apply it to your personal projects.
Have fun and happy learning.
In this course you will learn:
Basic concepts about keyframe animations like keyframes and interpolation
Create a basic animation in Krita to then export the animation data to a json file
Use Tensorflow JS with PoseNet to read the poses of a human body from a multimedia file
Create a Python script that reads the pose data to create animated armature to recreate the source material.
Execute the script in the scripting section provided by Blender
You will require:
You must be familiar with scripting; however, anyone can follow it as each step is explained.
Blender v 3 and above
Visual Studio Code. This is optional since Blender provide his own editor
Krita 5
Pre-trained TensorFlow JS models
Who this course is for:
- 3D designers or programmers who want to automate tasks to create complex 3D animations.
User Reviews
Rating

Oscar Villarreal
Instructor's Courses
Udemy
View courses Udemy- language english
- Training sessions 68
- duration 2:23:24
- Release Date 2023/07/04