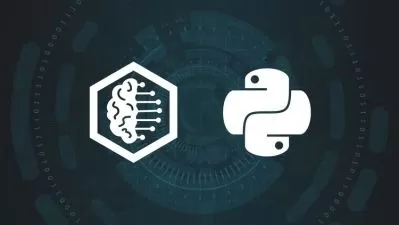
Ethical Hacking: Design Command and Control using Python 3
Bill Reed
18:22:05
Description
Learn Python and code a c2 tool that you can use for Red Team exercises, Penetration Tests, or for educational purposes
What You'll Learn?
- Python coding and how to build a feature rich command and control tool that you can use for authorized cybersecurity tests, for fun, or for educational purposes
- How to code the client and server portions of the tool and enable them to interact with each other
- How to run the client code on target computers that do not have Python installed
- How to build the client code for either Windows or Linux operating systems
- How to implement AES encryption for all traffic between client and server
- How to implement the following features in your tool: reverse shell, key logging, screen captures, clipboard stealing, turning volume up, playing audio files
- And more features: displaying images, upload/download of files, zip/encrypt of files, unzip/decrypt of files
- And more features: running operating system commands in the background, flipping computer's screen upside down, typing on the compromised computer
- How to allow for multiple compromised computers to communicate to the c2 server and switch control over them
- Numerous Python concepts and terminology; every line or block of code is explained
- How to use Wireshark, Windows Subsystem for Linux (WSL), Ubuntu Linux, and PyCharm Community Edition Integrated Development Environment (IDE)
- How to operate the c2 server in a cloud, and more
Who is this for?
What You Need to Know?
More details
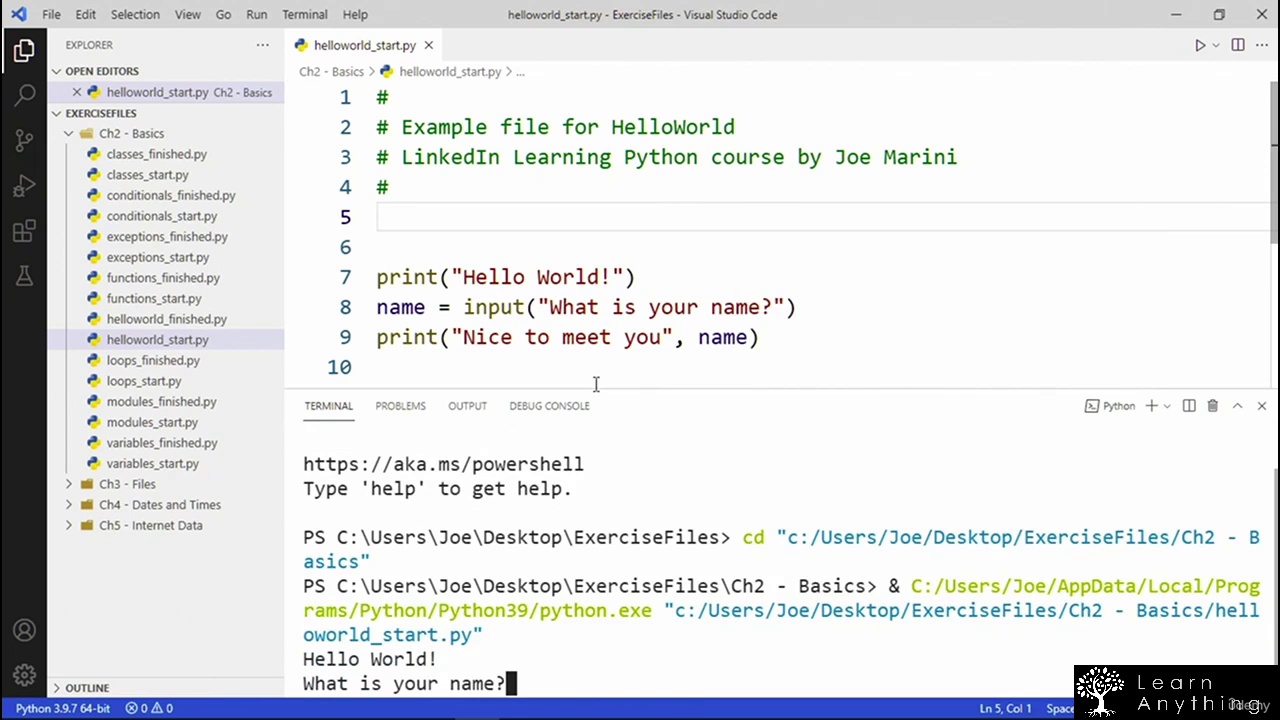
Description   Greetings course seekers. My course, “Ethical Hacking: Design Command and Control using Python 3†is hot off the press here in 2024. The way this course works is as follows:
   I will start at ground zero and show you how to design and build a fully featured command and control tool using Python 3. I will take the time to explain to you every bit of the code that I use to make this project happen. This is a project that I accomplished myself a couple of years ago, but during my recording sessions for this class, I decided to re-do the code quite a bit, to make it better, and thus, you will get a live and realistic experience, because when bugs show up, they are new for me just as they are for you. I will record for you how I handle these situations and hopefully you can learn from this process.
   I will show you how I started the project with a very humble beginning with a small little w3schools search, but then gradually expanded the code, turning it into a fully featured command and control tool over time, including both a client and server portion with many custom commands built in and with full end to end symmetric encryption.
   I will move slowly and try to explain everything to you, including the Python code and best practices. I am not trying to rush through anything here with you. I really do want you to learn. However, if you are looking for contrived exercises to do and those sorts of things, this is not the course for that. I am showing you real code for a real Red Team tool that will have real application for you, if you work in or have an interest in Cybersecurity or Ethical Hacking.
   The way this course will progress is that we will build the tool together starting from just a couple of lines of code. During every video, I am always using the term “we†because I expect you to be following along with me every step of the way. I will also provide you with 100% of the source code after each lesson, and the final state of the code at the end of the course. My code will become your code and you can take the tool to the next level, although it will be at a prominent level already.
   The course is divided up into sections with each video building upon the last. At the end of each section, I always do a Python summary review that speaks directly to the new Python code we covered during a section of the course. Some of you that have Python experience may want to skip these videos, but for beginners or for those who are rusty, I recommend watching them.
   The entire course is just over 18 hours in length and unlike other courses that cover many different topics and speed through everything, that is not what happens here. This course covers one topic, or you might consider it to be two topics and that is it. We have the command-and-control tool itself and we have the Python code that is building the tool. That is where all my energy and time will be directed, and this allows you to focus and learn.
   My goal is that my course here will be a spark that some of you need to start building your own tools, or to make this tool even better. Learning is easy and fun when you have an interest in something, thus if you have that interest, give my course a try. If you do not care about coding your own custom tools for ethical hacking, then this course is not going to be the right fit for you.
   Enough reading already! Go watch a few of my free preview videos and see what you think.
Who this course is for:
- Ideally, it is for those that have some basic knowledge in at least one programming language and has an interest or experience in ethical hacking/offensive cybersecurity and would like to learn how to build their own tools. However, I start at ground zero and explain every line or block of code, thus beginners can follow along and learn too. Full source code is available within the course, which allows those that do not care about learning the Python or those that already know Python to skip most of the lessons if they prefer, but still be able to use the code.
   Greetings course seekers. My course, “Ethical Hacking: Design Command and Control using Python 3†is hot off the press here in 2024. The way this course works is as follows:
   I will start at ground zero and show you how to design and build a fully featured command and control tool using Python 3. I will take the time to explain to you every bit of the code that I use to make this project happen. This is a project that I accomplished myself a couple of years ago, but during my recording sessions for this class, I decided to re-do the code quite a bit, to make it better, and thus, you will get a live and realistic experience, because when bugs show up, they are new for me just as they are for you. I will record for you how I handle these situations and hopefully you can learn from this process.
   I will show you how I started the project with a very humble beginning with a small little w3schools search, but then gradually expanded the code, turning it into a fully featured command and control tool over time, including both a client and server portion with many custom commands built in and with full end to end symmetric encryption.
   I will move slowly and try to explain everything to you, including the Python code and best practices. I am not trying to rush through anything here with you. I really do want you to learn. However, if you are looking for contrived exercises to do and those sorts of things, this is not the course for that. I am showing you real code for a real Red Team tool that will have real application for you, if you work in or have an interest in Cybersecurity or Ethical Hacking.
   The way this course will progress is that we will build the tool together starting from just a couple of lines of code. During every video, I am always using the term “we†because I expect you to be following along with me every step of the way. I will also provide you with 100% of the source code after each lesson, and the final state of the code at the end of the course. My code will become your code and you can take the tool to the next level, although it will be at a prominent level already.
   The course is divided up into sections with each video building upon the last. At the end of each section, I always do a Python summary review that speaks directly to the new Python code we covered during a section of the course. Some of you that have Python experience may want to skip these videos, but for beginners or for those who are rusty, I recommend watching them.
   The entire course is just over 18 hours in length and unlike other courses that cover many different topics and speed through everything, that is not what happens here. This course covers one topic, or you might consider it to be two topics and that is it. We have the command-and-control tool itself and we have the Python code that is building the tool. That is where all my energy and time will be directed, and this allows you to focus and learn.
   My goal is that my course here will be a spark that some of you need to start building your own tools, or to make this tool even better. Learning is easy and fun when you have an interest in something, thus if you have that interest, give my course a try. If you do not care about coding your own custom tools for ethical hacking, then this course is not going to be the right fit for you.
   Enough reading already! Go watch a few of my free preview videos and see what you think.
Who this course is for:
- Ideally, it is for those that have some basic knowledge in at least one programming language and has an interest or experience in ethical hacking/offensive cybersecurity and would like to learn how to build their own tools. However, I start at ground zero and explain every line or block of code, thus beginners can follow along and learn too. Full source code is available within the course, which allows those that do not care about learning the Python or those that already know Python to skip most of the lessons if they prefer, but still be able to use the code.
User Reviews
Rating

Bill Reed
Instructor's Courses
Udemy
View courses Udemy- language english
- Training sessions 91
- duration 18:22:05
- English subtitles has
- Release Date 2024/05/04