BLENDER: Learn how to create the military Black Hornet drone
Mrawan Hussain
11:07:03
Description
Learn how to create the military nano drone Black Hornet from start to finish using Blender
What You'll Learn?
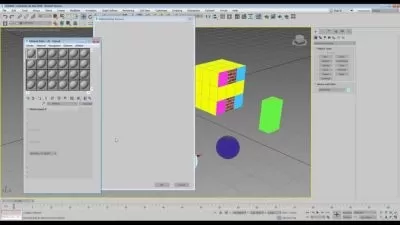
- Learn how to create complex shapes using simple geometries like a box and cylinders
- Learn how to create hard surface geometries using default modeling tools
- Learn how to illuminate the scene with HDRI images
- Learn how to make nice realistic render using cycles
- Learn how to control the depth of field effect using nice easy tricks
- Learn how to create motion blur and how to control the shutter speed
- Learn how to get rid of the bad shading when you model your geometry
- Learn how to use the compositor to make post-processing
Who is this for?
More details
DescriptionClass Overview
Hello everyone, welcome to my new course, how to create the nano drone Black Hornet using Blender from start to finish, in this course we will create a complete project from start to finish, I will cover all the steps starting from setting up the reference images until we reach the final render.
This course is in general focusing on modeling, you will learn with me how to create each part of the Black Hornet.
What you will learn
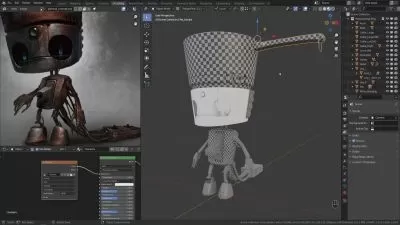
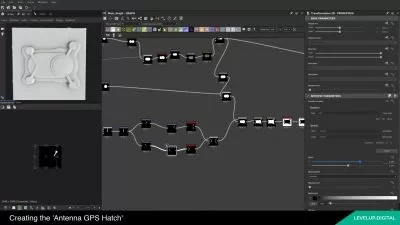
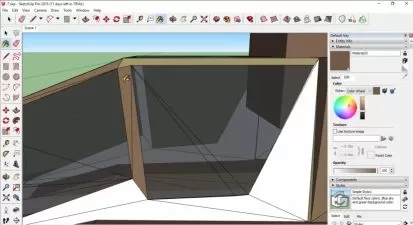
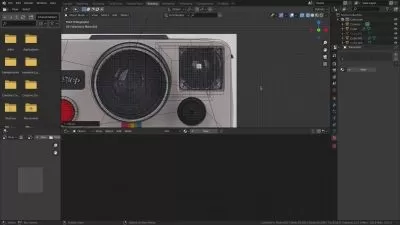
In this course we will learn how to create the Black Hornet using reference images, the modeling section will be the biggest part of the course, in the modeling section there are a lot of techniques we will use to achieve a clean good locking 3D model, in the modeling section I will talk about a lot of tools very important when it comes to model anything, you will see me how can I start from a box to create something complex using these tools.
We will learn how to set up the environment and illuminate the scene using HDRI images, to prepare the scene to the material section, in the material section we will learn how to create nice realistic plastic material to apply on the Black Hornet, and we will learn how to add decals to the objects and make them looks realistic, we will learn also how to create carbon fiber material to apply it on the big and the small rotors, after we finish creating all materials we will prepare the scene for the final render, I will use Cycles to render the scene, we will set up the camera and prepare the lights and the environment to achieve nice locking realistic render with some effects like adding depth of field effect and motion blur to make the result looks better.
Why Take This Class
If you want to create your own 3D model and don’t know how to start this course definitely will be helpful for you
If you want to create 3D models to sell, this course will teach you how to use Blender to achieve that goal
In this course, I will show you all the techniques I’m using to start from simple geometry to complex ones.
Who This Class Is For
The beginners will struggle a bit following this course, but I can say that this course is fit for the intermediate and advanced.
Materials And Resources
I will leave a section for the resources I will call ( Project Folder ) in this file you will find all the necessary resources to start the journey with me.
Who this course is for:
- The beginners will struggle a bit following this course, but I can say that this course is fit for the intermediate and advanced.
Class Overview
Hello everyone, welcome to my new course, how to create the nano drone Black Hornet using Blender from start to finish, in this course we will create a complete project from start to finish, I will cover all the steps starting from setting up the reference images until we reach the final render.
This course is in general focusing on modeling, you will learn with me how to create each part of the Black Hornet.
What you will learn
In this course we will learn how to create the Black Hornet using reference images, the modeling section will be the biggest part of the course, in the modeling section there are a lot of techniques we will use to achieve a clean good locking 3D model, in the modeling section I will talk about a lot of tools very important when it comes to model anything, you will see me how can I start from a box to create something complex using these tools.
We will learn how to set up the environment and illuminate the scene using HDRI images, to prepare the scene to the material section, in the material section we will learn how to create nice realistic plastic material to apply on the Black Hornet, and we will learn how to add decals to the objects and make them looks realistic, we will learn also how to create carbon fiber material to apply it on the big and the small rotors, after we finish creating all materials we will prepare the scene for the final render, I will use Cycles to render the scene, we will set up the camera and prepare the lights and the environment to achieve nice locking realistic render with some effects like adding depth of field effect and motion blur to make the result looks better.
Why Take This Class
If you want to create your own 3D model and don’t know how to start this course definitely will be helpful for you
If you want to create 3D models to sell, this course will teach you how to use Blender to achieve that goal
In this course, I will show you all the techniques I’m using to start from simple geometry to complex ones.
Who This Class Is For
The beginners will struggle a bit following this course, but I can say that this course is fit for the intermediate and advanced.
Materials And Resources
I will leave a section for the resources I will call ( Project Folder ) in this file you will find all the necessary resources to start the journey with me.
Who this course is for:
- The beginners will struggle a bit following this course, but I can say that this course is fit for the intermediate and advanced.
User Reviews
Rating

Mrawan Hussain
Instructor's Courses
Udemy
View courses Udemy- language english
- Training sessions 44
- duration 11:07:03
- Release Date 2023/06/06