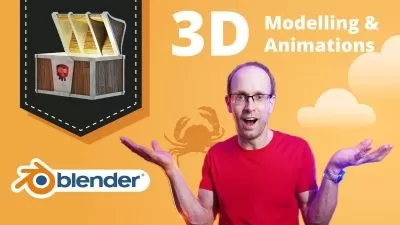
Blender 3: Stylized Scene The Ultimate Guide
3D Tudor
24:26:05
Description
Learn Blender 3 Create Stylized 3D models and sims style scenes . Create amazing procedural materials from scratch.
What You'll Learn?
- • Creating fully procedural shaders and materials for every single model in the scene
- • • Maintaining and optimising stylized art aesthetics in a Sims, Sim City, and City Skylines art style
- • Using Blender 3.0 and understanding its new interface and shortcuts
- • Mastering Blender 3.0 noise nodes and creating glass shaders
- • Following through a complete guide on creating a game-ready quality stylized tropical hotel resort fit with sun shader, deck chairs, balconies, solar panels,
- • Using modifier stacking to create stylized walls that look like they have been sculpted
- • Next level compositing Blender 3 guide including sharpness, colourisation, and bloom
- • The most complete Blender 3 asset manager overview to help you scale this scene into a large seaside resort
- • A course within a course introduction into (a) Blender basics, (b) materials and textures, (c) seams, sharps, and UVs.
- • Learning how to use HDRIs as 3D model backgrounds for your portfolio
- • Maximising the potential of your references to develop strong game asset concepts
- • Effective problem-solving in Blender
- • Complete UV Mapping Guide: UV mapping and UV unwrapping your model
- • Learning how to use rendering to improve the quality of presentation for your 3D environment in Blender Cycles and Cycles X
- • Completing a full introduction to lighting and composition for 3D modelling artists and beyond
- • Rendering game assets to a high level for professional 3D artist portfolios
Who is this for?
More details
DescriptionCourse Description
An upgrade to Blender 3.0 won’t cost you anything.
How can we make your transition to Blender 3.0 even better?
Join ‘Blender 3 Stylized Scene Ultimate Guide’ to learn how to use Blender 3.0 and how to master its newest and most complex functionalities.
Challenge yourself with a stylized tropical hotel resort 3D modelling project and become the 3D modelling artist you have always wanted to be.
Here are my best 5 points about the new exciting things you will be learning about through this class:
1. Complete Sims, Sims City and City Skylines art style workflow;
2. Fully procedural textures including ambient occlusion and ocean shader;
3. Extensive use of modifiers to simplify the building process, including walls and cobblestones;
4. Next level compositing Blender 3.0 guide including sharpness, colourisation, and bloom;
5. The most complete Blender 3.0 asset manager overview to help you scale this scene into a large seaside resort;
Start learning Blender 3.0 with ‘Blender 3 Stylized Scene Ultimate Guide’!
‘Blender 3 Stylized Scene Ultimate Guide’ will see you creating a hotel resort with all the perks. Your stylized scene will remind you of the art style of Sims, Sim City and City Skylines, some of the top video game contenders in the stylised digital art genre. Your hotel resort will feature air conditioners, deck chairs, a parking barrier, a lamppost, a bar, a variety of foliage, different types of bins, and a Vespa motorbike.
This course will give you access to just over 24 hours (yes, a whole day!) of 3D art.
Learning how to achieve realism through setting the scene and incorporating storytelling into your 3D game environments will be a central part of this course's learning objectives.
You will learn how to work and 3D model to real-world dimensions, in addition to developing the know-how about what to expect where in this type of scene.
Through reading this course description you will find out:
- What you want to learn about 3D modelling;
- What you are going to get through ‘Blender 3 Stylized Scene Ultimate Guide’, and;
- How the course will take your 3D modelling skills to the next level.
Modeling
I enjoy creating little props that can bring a scene to life. One of the things you can do to add to realism within your scenes is to create plenty of small props to make the scene look busy. ‘Blender 3 Stylized Scene Ultimate Guide’ will introduce you to the Blender 3.0 asset manager, helping you organise all of these to maximise the efficiency of your prop placement in the scene.
Details are very important as we will cover what you might want to look for at the back of hotels, making it all the more believable by hiding the ugly behind the beautiful. From surfing boards and other beach props to a hotdog stand, you will always be working on something new in this course!
As a 3D modelling artist with an avid interest in environment modeling, you will need to know how to use props to tell a story through your art. For example, the placement of the Vespa at the back of one of the hotels might make you think that it belongs to one of the staff members who have parked it there to quickly go on a ride around the seafront after work. In a few words, props can make a 3D scene believable.
Among other character-boosting assets, you will find out how to character model tiger sharks, and where to place them. This will be your first introduction to organic meshes and you can be sure they need an entirely different approach to digital art. We will not be using the sculpting tools for this. It is a basic mesh and you will need to learn how to create these before sculpting to give yourself a good base to work from.
Texturing and Materials
‘Blender 3 Stylized Scene Ultimate Guide’ will provide you with intensive learning all in one place, giving you access to over 50 references, 1 HDRI map, and 1 human reference.
This course is a texturing masterclass. You will learn about all the node systems Blender 3.0 has to offer. Through ‘Blender 3 Stylized Scene Ultimate Guide’, you will be creating fully procedural shaders and materials for every single model in the scene
The node wrangler is one of the best free built-in addons within Blender but most users are not even aware of it. This course will teach you how to create your materials, find out how to take all of those beautiful texture maps and make use of them.
When it comes to shaders, you will certainly want to know how to create transparency. You will also learn how to use noise textures to create variations for your materials. Blender comes with a whole host of nodes, but I will show you why the varied noise nodes are the most important.
We will also cover how to create a glass shader in Blender. It will be essential to get this right since most of our hotel’s exterior is made up of glass and it is a huge focal point of the whole ‘Blender 3 - Stylized Scene Ultimate Guide’ scene.
Maximising your knowledge of Blender’s node system will raise the level of your textures and skill up your skill in working with materials.
Lighting & Rendering
Lighting is essential to making a 3D scene pop. It helps you tell a story and convey the mood, what time of day it is or what the weather is like. It’s very similar to how lighting works in photography and cinematography.
‘Blender 3 Stylized Scene Ultimate Guide’ will be your introduction to lighting skills for 3D modelling artists. You will learn about specific types of in-built Blender lighting functionalities that will enhance the sunny weather and tropical atmosphere of your hotel resort. You will also find out about how composition works with lighting to direct your viewer’s attention to what you want them to see.
We will be going through the many pitfalls and some technical details of what Cycles render options to use for the specific machine you are using. I will also be introducing you to the all-new Cycles X Blender renderer.
Together, we will be creating a portfolio render for any multimedia site you wish to upload your completed model to.
‘Blender 3 Stylized Scene Ultimate Guide’ is a complete guide into using Cycles, and Cycles X for lighting, rendering, shadow.
Course Resources & Freebies
The ‘Blender 3 Stylized Scene Ultimate Guide’ pack includes 50 references, 1 HDRI map, and 1 human reference.
Join this course and come be part of a 3D modelling journey of over 24 hours of learning that will see you go away with a game-ready stylized environment set in the tropics, ready to go on holiday this summer!
Check out the free introduction and I am sure you won’t be able to put this course down!
Still unsure? Then, let me tell you what's unique about this course:
· Following through a complete guide on creating a game-ready quality stylized tropical hotel resort fit with sun shaders deck chairs, balconies, solar panels, and plenty of sand to sunbathe on;
· Maximising the potential of your references to develop strong game asset concepts;
· Learning how to use HDRIs as 3D model backgrounds for your portfolio;
· Maintaining and optimizing stylized art aesthetics in a Sims, Sim City, and City Skylines art style;
· Learning how to use rendering to improve the quality of presentation for your 3D environment in Blender Cycles and Cycles X;
· Rendering game assets to a high level for professional 3D artist portfolios.
Let’s create something sunny, fun, and stylized 3D game environment this April to get ready for our own dips in the sea this summer!
Until next time, happy modelling everyone!
Neil – 3D Tudor
Who this course is for:
- • Beginner 3D modellers eager to learn how to build game-ready stylized assets such as surfing boards and other beach props, a hotdog stand, and a vespa motorbike
- • Enthusiasts of Blender who want to fast-track their understanding of its new and exciting changes
- • Mid-Level 3D modellers who want to take their modelling to a new level and improve their workflow with tips and tricks
Course Description
An upgrade to Blender 3.0 won’t cost you anything.
How can we make your transition to Blender 3.0 even better?
Join ‘Blender 3 Stylized Scene Ultimate Guide’ to learn how to use Blender 3.0 and how to master its newest and most complex functionalities.
Challenge yourself with a stylized tropical hotel resort 3D modelling project and become the 3D modelling artist you have always wanted to be.
Here are my best 5 points about the new exciting things you will be learning about through this class:
1. Complete Sims, Sims City and City Skylines art style workflow;
2. Fully procedural textures including ambient occlusion and ocean shader;
3. Extensive use of modifiers to simplify the building process, including walls and cobblestones;
4. Next level compositing Blender 3.0 guide including sharpness, colourisation, and bloom;
5. The most complete Blender 3.0 asset manager overview to help you scale this scene into a large seaside resort;
Start learning Blender 3.0 with ‘Blender 3 Stylized Scene Ultimate Guide’!
‘Blender 3 Stylized Scene Ultimate Guide’ will see you creating a hotel resort with all the perks. Your stylized scene will remind you of the art style of Sims, Sim City and City Skylines, some of the top video game contenders in the stylised digital art genre. Your hotel resort will feature air conditioners, deck chairs, a parking barrier, a lamppost, a bar, a variety of foliage, different types of bins, and a Vespa motorbike.
This course will give you access to just over 24 hours (yes, a whole day!) of 3D art.
Learning how to achieve realism through setting the scene and incorporating storytelling into your 3D game environments will be a central part of this course's learning objectives.
You will learn how to work and 3D model to real-world dimensions, in addition to developing the know-how about what to expect where in this type of scene.
Through reading this course description you will find out:
- What you want to learn about 3D modelling;
- What you are going to get through ‘Blender 3 Stylized Scene Ultimate Guide’, and;
- How the course will take your 3D modelling skills to the next level.
Modeling
I enjoy creating little props that can bring a scene to life. One of the things you can do to add to realism within your scenes is to create plenty of small props to make the scene look busy. ‘Blender 3 Stylized Scene Ultimate Guide’ will introduce you to the Blender 3.0 asset manager, helping you organise all of these to maximise the efficiency of your prop placement in the scene.
Details are very important as we will cover what you might want to look for at the back of hotels, making it all the more believable by hiding the ugly behind the beautiful. From surfing boards and other beach props to a hotdog stand, you will always be working on something new in this course!
As a 3D modelling artist with an avid interest in environment modeling, you will need to know how to use props to tell a story through your art. For example, the placement of the Vespa at the back of one of the hotels might make you think that it belongs to one of the staff members who have parked it there to quickly go on a ride around the seafront after work. In a few words, props can make a 3D scene believable.
Among other character-boosting assets, you will find out how to character model tiger sharks, and where to place them. This will be your first introduction to organic meshes and you can be sure they need an entirely different approach to digital art. We will not be using the sculpting tools for this. It is a basic mesh and you will need to learn how to create these before sculpting to give yourself a good base to work from.
Texturing and Materials
‘Blender 3 Stylized Scene Ultimate Guide’ will provide you with intensive learning all in one place, giving you access to over 50 references, 1 HDRI map, and 1 human reference.
This course is a texturing masterclass. You will learn about all the node systems Blender 3.0 has to offer. Through ‘Blender 3 Stylized Scene Ultimate Guide’, you will be creating fully procedural shaders and materials for every single model in the scene
The node wrangler is one of the best free built-in addons within Blender but most users are not even aware of it. This course will teach you how to create your materials, find out how to take all of those beautiful texture maps and make use of them.
When it comes to shaders, you will certainly want to know how to create transparency. You will also learn how to use noise textures to create variations for your materials. Blender comes with a whole host of nodes, but I will show you why the varied noise nodes are the most important.
We will also cover how to create a glass shader in Blender. It will be essential to get this right since most of our hotel’s exterior is made up of glass and it is a huge focal point of the whole ‘Blender 3 - Stylized Scene Ultimate Guide’ scene.
Maximising your knowledge of Blender’s node system will raise the level of your textures and skill up your skill in working with materials.
Lighting & Rendering
Lighting is essential to making a 3D scene pop. It helps you tell a story and convey the mood, what time of day it is or what the weather is like. It’s very similar to how lighting works in photography and cinematography.
‘Blender 3 Stylized Scene Ultimate Guide’ will be your introduction to lighting skills for 3D modelling artists. You will learn about specific types of in-built Blender lighting functionalities that will enhance the sunny weather and tropical atmosphere of your hotel resort. You will also find out about how composition works with lighting to direct your viewer’s attention to what you want them to see.
We will be going through the many pitfalls and some technical details of what Cycles render options to use for the specific machine you are using. I will also be introducing you to the all-new Cycles X Blender renderer.
Together, we will be creating a portfolio render for any multimedia site you wish to upload your completed model to.
‘Blender 3 Stylized Scene Ultimate Guide’ is a complete guide into using Cycles, and Cycles X for lighting, rendering, shadow.
Course Resources & Freebies
The ‘Blender 3 Stylized Scene Ultimate Guide’ pack includes 50 references, 1 HDRI map, and 1 human reference.
Join this course and come be part of a 3D modelling journey of over 24 hours of learning that will see you go away with a game-ready stylized environment set in the tropics, ready to go on holiday this summer!
Check out the free introduction and I am sure you won’t be able to put this course down!
Still unsure? Then, let me tell you what's unique about this course:
· Following through a complete guide on creating a game-ready quality stylized tropical hotel resort fit with sun shaders deck chairs, balconies, solar panels, and plenty of sand to sunbathe on;
· Maximising the potential of your references to develop strong game asset concepts;
· Learning how to use HDRIs as 3D model backgrounds for your portfolio;
· Maintaining and optimizing stylized art aesthetics in a Sims, Sim City, and City Skylines art style;
· Learning how to use rendering to improve the quality of presentation for your 3D environment in Blender Cycles and Cycles X;
· Rendering game assets to a high level for professional 3D artist portfolios.
Let’s create something sunny, fun, and stylized 3D game environment this April to get ready for our own dips in the sea this summer!
Until next time, happy modelling everyone!
Neil – 3D Tudor
Who this course is for:
- • Beginner 3D modellers eager to learn how to build game-ready stylized assets such as surfing boards and other beach props, a hotdog stand, and a vespa motorbike
- • Enthusiasts of Blender who want to fast-track their understanding of its new and exciting changes
- • Mid-Level 3D modellers who want to take their modelling to a new level and improve their workflow with tips and tricks
User Reviews
Rating
3D Tudor
Instructor's Courses
Udemy
View courses Udemy- language english
- Training sessions 132
- duration 24:26:05
- Release Date 2023/06/06


