Autodesk Inventor, a complete guide from beginner to expert
Marius Brink
25:57:01
Description
26 Hours of video content
What You'll Learn?
- Basic and advanced design skills, sheet metal, design generator, 3D animation, FEA NASTRAN, 3D printing
Who is this for?
What You Need to Know?
More details
DescriptionComplete guide to engineering modelling and design using Autodesk Inventor. Course is designed using real world applications and scenario so that students will become competent users of Autodesk Inventor, as well as learning draughting design techniques and skills to become a real valuable assist to any company. The course begins with the basics of using the software and move into more advanced techniques such as Sheet Metal, Finite Element Analysis (FEA) using NASTRAN, 3D animation and 3D printing.
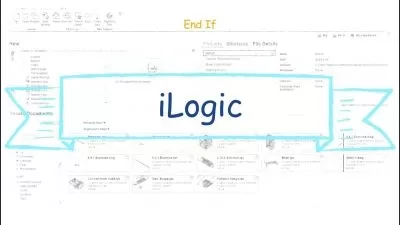
Section 1 will serve as your introduction to Autodesk Inventor. Here we will cover the basics of drawing, modelling and getting familiar with the user interface. We will also cover some more advanced sections such as basic animation, design generator and 3D sketches. There is also an instruction video covering how to download and install Autodesk Inventor (2020). This is the largest portion of the course and contains valuable information and skills that will be required later on.
In section 2 we will cover Sheet Metal. Sheet Metal is one of the invaluable functions that Inventor has to offer. Ideal for industries using metal sheets and those who use press breaks as part of their manufacturing. Sheet Metal enables the user to create accurate templates, sheet, coil and plate cut sizes, as well as giving bending steps showing which part to bend first and which part to bend last to enable you to get the end product you desire.
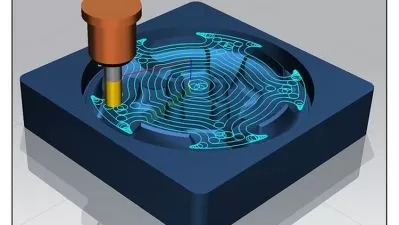
Next, we move on to section 3, Frame Generator. Ideal for use with structural members such as tubes, pipes, angles and beams. Here we will go a little deeper into 3D sketches. Frame Generator makes it simple to replace structural members without having to change or redraw the frame structure. It offers useful functions such as mitres, which automatically generates the perfect fit between the individual structural members.
In Section 4 we will cover yet another of Inventor’s invaluable functions, NASTRAN. NASTRAN, an abbreviation for NAsa STRuctural ANalysis, is a software package designed by NASA which is offered within Inventor. NASA developed this software in the 1960s to aid them with Finite Element Analysis (FEA). This software was developed to design more efficient space vehicles such as the Space Shuttle. FEA is invaluable to any industry and ideal for the pressure vessel manufacturing industries.
We now move on to one of the Inventor’s more creative functions. In section 5 we will cover in more detail 3D animation using Inventor Studio. This is ideal for creating short videos, showing exactly how a specific item is designed, or how it interacts within a system.
Section 6 is our final section and it is an introduction to one of the fastest-growing and incredibly exiting industries. The 3D printing industry is one of the most profitable and lucrative industries. It offers limitless possibilities; the technology is improving every year and the introduction of 3D metal printing has changed the manufacturing industry forever. With 3D printing, you can create prototypes which cost a fraction of what a machined item would cost and it enables you to design components that are impossible to manufacture using traditional machining methods. It is also a wonderful hobby to have, designing and printing unique gifts and items needed around the house.
Who this course is for:
- New and experienced users of Inventor, designers and engineers
Complete guide to engineering modelling and design using Autodesk Inventor. Course is designed using real world applications and scenario so that students will become competent users of Autodesk Inventor, as well as learning draughting design techniques and skills to become a real valuable assist to any company. The course begins with the basics of using the software and move into more advanced techniques such as Sheet Metal, Finite Element Analysis (FEA) using NASTRAN, 3D animation and 3D printing.
Section 1 will serve as your introduction to Autodesk Inventor. Here we will cover the basics of drawing, modelling and getting familiar with the user interface. We will also cover some more advanced sections such as basic animation, design generator and 3D sketches. There is also an instruction video covering how to download and install Autodesk Inventor (2020). This is the largest portion of the course and contains valuable information and skills that will be required later on.
In section 2 we will cover Sheet Metal. Sheet Metal is one of the invaluable functions that Inventor has to offer. Ideal for industries using metal sheets and those who use press breaks as part of their manufacturing. Sheet Metal enables the user to create accurate templates, sheet, coil and plate cut sizes, as well as giving bending steps showing which part to bend first and which part to bend last to enable you to get the end product you desire.
Next, we move on to section 3, Frame Generator. Ideal for use with structural members such as tubes, pipes, angles and beams. Here we will go a little deeper into 3D sketches. Frame Generator makes it simple to replace structural members without having to change or redraw the frame structure. It offers useful functions such as mitres, which automatically generates the perfect fit between the individual structural members.
In Section 4 we will cover yet another of Inventor’s invaluable functions, NASTRAN. NASTRAN, an abbreviation for NAsa STRuctural ANalysis, is a software package designed by NASA which is offered within Inventor. NASA developed this software in the 1960s to aid them with Finite Element Analysis (FEA). This software was developed to design more efficient space vehicles such as the Space Shuttle. FEA is invaluable to any industry and ideal for the pressure vessel manufacturing industries.
We now move on to one of the Inventor’s more creative functions. In section 5 we will cover in more detail 3D animation using Inventor Studio. This is ideal for creating short videos, showing exactly how a specific item is designed, or how it interacts within a system.
Section 6 is our final section and it is an introduction to one of the fastest-growing and incredibly exiting industries. The 3D printing industry is one of the most profitable and lucrative industries. It offers limitless possibilities; the technology is improving every year and the introduction of 3D metal printing has changed the manufacturing industry forever. With 3D printing, you can create prototypes which cost a fraction of what a machined item would cost and it enables you to design components that are impossible to manufacture using traditional machining methods. It is also a wonderful hobby to have, designing and printing unique gifts and items needed around the house.
Who this course is for:
- New and experienced users of Inventor, designers and engineers
User Reviews
Rating

Marius Brink
Instructor's Courses
Udemy
View courses Udemy- language english
- Training sessions 97
- duration 25:57:01
- English subtitles has
- Release Date 2023/08/01